Sunday, March 3, 2013

DIY Drink Coasters Tutorial

Hi Everyone!!

It has been awhile since our last post.  We have been busy working on opening up our Etsy shop and have gotten our first couple of sales, which has been fun!!

We've added some more items since we opened, check it out here!

Onto the tutorial of the day - DIY Coasters!
This is one of our favorite projects so far.  There are endless options of what you can make design wise, so it can coordinate with any decor.  Best of all, this project cost under $10 and only takes an hour or two (most of the time is spent waiting for the Mod Podge coats to dry).

Supplies
Supplies
* 6 - 4.25" x 4.25" Porcelain tiles from Home Depot- they are only 13 cents each!
* Matte Mod Podge
* Felt or Cork (You'll need enough to cover each of the bottoms of the tiles)
* 2 sheets of 12" x 12" scrapbook paper of your choice
* Foam brush
* Adhesive/glue of choice (to glue paper on the tile)
* Krylon Clear Acrylic Sealer (sold at Michael's by the spray paint)

 Tutorial
 1. Cut out scrapbook paper to fit on the top of the tile. 
Glue the paper to the tile.

2.  Glue paper on each of the tiles.  We used this Elmer's Craft Bond spray and it worked great!


Tile with paper glued on

 3. Add 3 or 4 coats of Mod Podge over the paper to seal it in place.  Wait about 20 minutes in between each coat of Mod Podge.

 4.  Once they have been sealed with Mod Podge spray on an acrylic sealer (got it at Michael's by the spray paint) to keep the coasters waterproof.
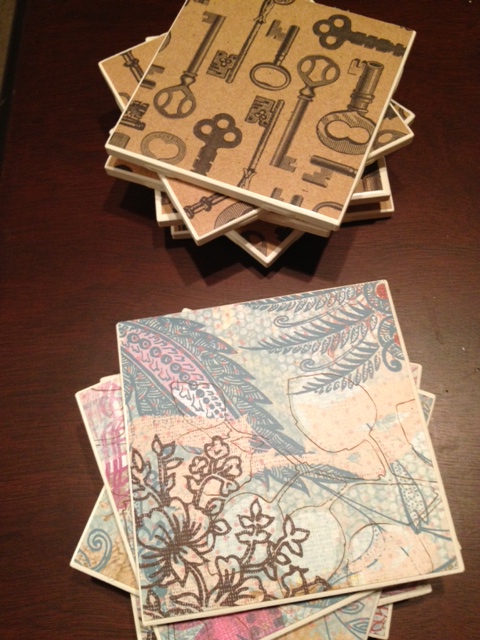
Completed coasters!

 5.  Cut squares of felt and glue them on the bottom of each tile to keep the coasters from scratching your furniture.

That's it!! How easy was that?!  These can be done in any design and make great gifts!
Coaster in use! :)


Enjoy!!


Sunday, January 20, 2013

Thursday Night Threads is now on Etsy!

We have some very exciting news!


Remember the quilts? And the infinity scarves? Now you can have one too! We started our store on Etsy.com so you can buy the best of our sewing projects and crafts. Find us at http://www.etsy.com/shop/ThursdayNightThreads.


You’ll find homemade quilts and modern accessories made by both of us. Keep checking in because the list of items will grow! If you have a custom order or request, please feel free to reach out to us through our Etsy.com site or ThursdayNightThreads@gmail.com. We’re more than happy to customize so you are 100% happy with your purchase.

Tell your friends about us, and THANK YOU for supporting our new "venture!"


Here's a sneak preview of some of our products for sale!


Enjoy!

Sunday, December 30, 2012

Winter Wonderland--Snow Globes Tutorial

We are sad that Christmas decorations are coming down. It's too soon for Valentine's Day, so what's a girl to do?

Make Snow Globes!!!

Snow globes make great winter decorations and don't need to be Christmas-focused. Here's a how-to for creating easy and adorable snow globes.

Shopping List:
Supplies for 4 snow globes
  • Jars with lids that are water-tight
  • Glitter
  • Ornaments/figurines
  • Stones (mancala or marbles)
  • Hot glue gun

How-to:
1.  Using the hot glue gun, glue the stones to the inside of the lid. Glue the ornament on the stones.

2.  Fill the jar with 1-2 Tbsp of glitter.

3.  Fill the jar with water then screw on the jar lid tightly.

4.  Turn it so the ornament is right-side-up and give it a shake.


Finished DIY snow globes! :)                             


Tah-dah! That's all it takes to create a cute snow globe to decorate for the 
winter!

Give it a try...It's fun to get creative with what to put inside!


Thursday, December 20, 2012

Dress It Up with an Infinity Scarf

The Infinity Scarf (loop scarf) is a unique and trendy way to spice up an outfit. They look great with anything from a simple t-shirt to a sweater to a winter jacket. I've seen Infinity scarves in cotton voile (a very soft, lightweight fabric) to knits to rayon and in any pattern and color under the sun.

Years ago, an old roommate made an Infinity scarf for me as a holiday gift. It was a long piece of fabric sewn once to connect the ends. Although cute, I spend lots of time adjusting it to hide the rougher edges and seems.

Recently, I learned how to sew Infinity scarves in a tube, so that no seems show through. I'm giving them as holiday gifts to girlfriends, customizing the patterns for their personalities. The scarves turned out so well, I want to start selling them. Stay tuned!

Here is a picture of one of the scarves. Wouldn't this be great with a brown leather coat?

Infinity Scarf


Sunday, December 16, 2012

Cookie Baking Extravaganza!

It's been awhile since our last post.  We have been busy with the holiday season!  Shopping, spending time with family, and of course, baking!  We'll give you a glimpse of our Christmas cookie baking and share the recipes we have made! 
  
Last Sunday, when it was snowing like crazy in Minneapolis, we thought, what better day to stay inside and bake dozens of cookies?!  30 dozen cookies to be exact.  No, we didn't have any reason to make this many cookies...other than we wanted enough to share with work, friends and family! :)

As long as we were stuck inside, why not bake like crazy?!  Here are our supplies before our 7 hour baking frenzy.


Gathering our supplies before baking

We looked all over for both new recipes and some of the tried and true recipes and we ended up with a pretty solid lineup.  

We made (see links for recipes):
*Turtle Cookies: These ones are great!  The perfect combo of pecans, chocolate and caramel. Definitely a winner!

*Salted Caramel Chocolate Shortbread Bars: These are another favorite!  Shortbread layer on the bottom, thick caramel layer in the middle, topped with chocolate and sea salt!  It makes an entire 8 x 13 pan!  This is a make your own caramel-but don't worry...it's easy with the candy thermometer!  Just follow the instructions as listed and ensure that you stop cooking the caramel when it's at 240°F.
  
*Mexican Wedding Cakes: Tried and true favorite!  Simple recipe, and delicious!

*Christmas Crock-pot Candy: 
This is the recipe that gave us the biggest headache.  We made it as directed and the peanuts ended up burning in the crock pot, even when on low.  We may see if there is a better way

*Chocolate Pretzel Rings: These ones are simple-no recipe needed!  Just set the oven at 275°F and put a baking sheet (with parchment paper) of pretzel rings with a chocolate kiss in the middle (we used caramel ones-yum!  You could use any of the flavors out there now) in for 3 minutes.  As soon as they come out of the oven press a M & M on the kiss and let it harden.

*Chocolate Peanut-Butter No Bake Cookies:These are so easy!  We were running out of vanilla extract and we were stuck inside because of the snow, so we couldn't run to get more-so we replaced the vanilla with almond extract.  This substitute was a good surprise!

 We cannot take credit for any of the recipes, so please see the links above to get the recipes. :)


Here are our finished products!

Yum!!

We hope you try these simple and delicious recipes!  Share some of your favorites in the comments below!


Tuesday, November 27, 2012

Like Kids in a Candy Store! Cinnamon Hard Candies

It's that time of year...holiday baking has begun!  This year, we decided to branch out a little and try some hard candies along with Christmas cookies!  Neither of us have had experience making candies and we had heard that it can be a bit tricky!  It went surprisingly well for us!  In about 30 minutes we had a pound of tasty and addicting cinnamon hard candies!  We'll walk you through it, but we found the original recipe on Taste of Homes here.

Supplies

Ingredients

* 2 cups of sugar
* 1 cup of water
* 1/2 cup of light corn syrup
* 1/4 to 1/2 teaspoon of cinnamon oil 
* 1/2 teaspoon of red food coloring   

Note: We found cinnamon oil at Kitchen Window (a specialty kitchen shop) for $1.99 a bottle

Instructions


1. In a large saucepan, combine sugar, water and corn syrup.


 2. Bring to a boil over medium heat and then cover and cook for 3 minutes.

 3. Uncover and put your candy thermometer in the mixture and wait for the temperature to reach 310°F (hard-crack stage).

As it gets to 310 degrees, the mixture thickens

 4. Once the mixture reaches 310°F, quickly remove from heat, mix in food coloring and cinnamon oil and pour into a greased 9 x 13 baking pan.

5.  Score the candy into 1 inch squares and then cut through each square.

Scoring/cutting the candy
  
That's it!  Enjoy your hard candies and try out some different flavored oils!  We are going to try peppermint and butterscotch next!


Finished Candies


Saturday, November 24, 2012

DIY Wall Art Panels – Scrapbook Paper and Styrofoam Board

Ever since I joined Pinterest, I’ve seen different ideas for using scrapbook paper and foam board to make beautiful, decorative DIY wall art. I’m not allowed to paint my walls, so big wall art goes a long way to brighten up a dull space. This craft project is a fun way to express yourself and “wow” your friends and family. Here is the wall art I made for my living room!


Katie's DIY wall art

Materials & Tutorial


Shopping List:

  • 9 – 12 in. x 12 in. scrapbook paper sheets/pages (most are less than $1.00 each @ Michaels)
  • 9 – 1 in. x 12 in. x 12 in. Styrofoam boards (Michaels sells ½ in. boards for $3.99 each, but I went to Home Depot and bought a 1 in. x 48 in. x 8 ft. sheet of Styrofoam for $13.25 and had them cut it into the pieces I needed. Plus, I have plenty of extra for other crafts!)
  • Elmer’s glue
  • Sponge paint roller to spread the glue on the boards (the glue washes out so you can reuse the roller for other projects)
  • Choose your border: 36 ft. of ribbon the width of your foam board and Elmer’s glue or a hot glue gun - OR - acrylic paint, sponge roller (you can reuse the one for gluing)
  • 3M Command Damage-Free Hanging Medium Refill Strips 9-ct. ($3.99 @ Michaels *eligible for coupons* or $3.14 @ Target)

(Scrapbook paper spread out on Michaels floor)
(Cutting my square panels at Home Depot)

**Note: When I made my wall art, I put the scrapbook paper on the board before the ribbon. Looking back, it would have been much easier to paint the borders (instead of ribbon) and then glue on the paper. The tutorial will walk you through the EASIER way!**

Tutorial:

  1. Depending on what you chose for your border, either paint the edges of each Styrofoam board or glue ribbon onto the edges. Let them dry all the way before moving on to the next step. If you are reusing your sponge paint roller for the glue, rinse and dry it out thoroughly.
  2. Use the sponge paint roller to cover the surface of the board with Elmer’s glue. Quickly (but carefully!) lay the scrapbook paper on the surface. To avoid air bubbles, start by lining up one edge and work your way to the other. Repeat this for each of the nine boards, letting the glue dry before hanging.
  3. Hang the nine panels on the wall using the 3M Command Strips. I love using these because they make the panels look flat against the wall and don’t leave marks if you eventually want to move your wall art. I spaced my panels 1 ½ in. apart on my living room wall.


My completed DIY wall art hanging above the couch

My friend Courtney liked my wall art, so she made one that matched her place. Since I had plenty of extra Styrofoam boards, she used mine to make her own gorgeous version.

Courtney used nine different patterns in matching cool colors

If you have any questions or want to share your ideas, please send us an email at ThursdayNightThreads@gmail.com